Cinematic layer explosion
Blow minds by assembling your artboard's layers in an insane animation

In this experimental Rotato feature you can make beautiful exploded effects at the push of a button, simply by using the design files you most likely already have made in your design tool of choice.
Here's what we'll do:
- What you'll need
- How do it, at a glance
- Installing the plugin
- Snapshots
- Animate exploded artboards
- Optional: Change the center of the rotation
What you'll need
- Figma.
- An artboard the size of the device you'll use in Rotato. iPhoneX and the generic phone are
375x815or a scale variant of the same ratio.
How do it, at a glance
- In Figma, select the artboard you want to explode
- Go to Plugins > Rotato > Check Explode Layers > Render
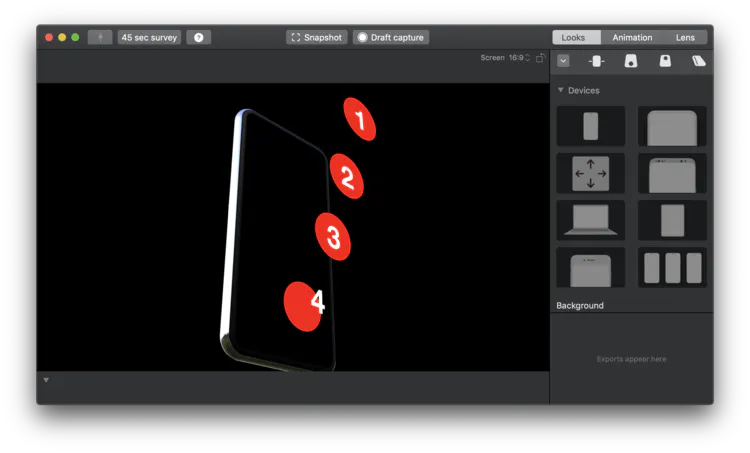
- Switch to Rotato
- Adjust layer levitation in the Looks sidebar
- Rotate, animate and export
Installing the plugin
Go to Rotato's top menu and choose Install plugin for the design app you're using. For Figma, you can install the plugin right from the web. Read more about Rotato for Figma.
Understanding your layers in 3D space
Take a look at the layers in your artboard. The top-level layers are the ones that Rotato turns into floating 3D elements. Groups will appear as a single 3D element in Rotato. This is good for buttons with a glyph and a background, as an example.
These layers in your design app
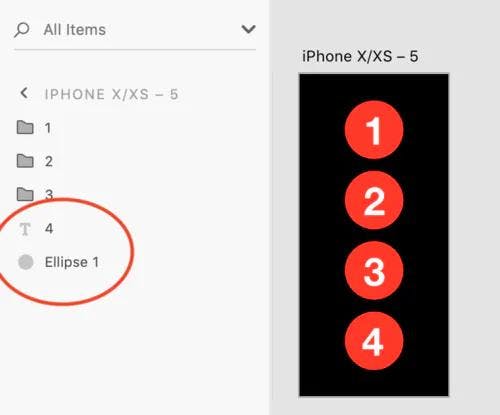
... will look like this in Rotato
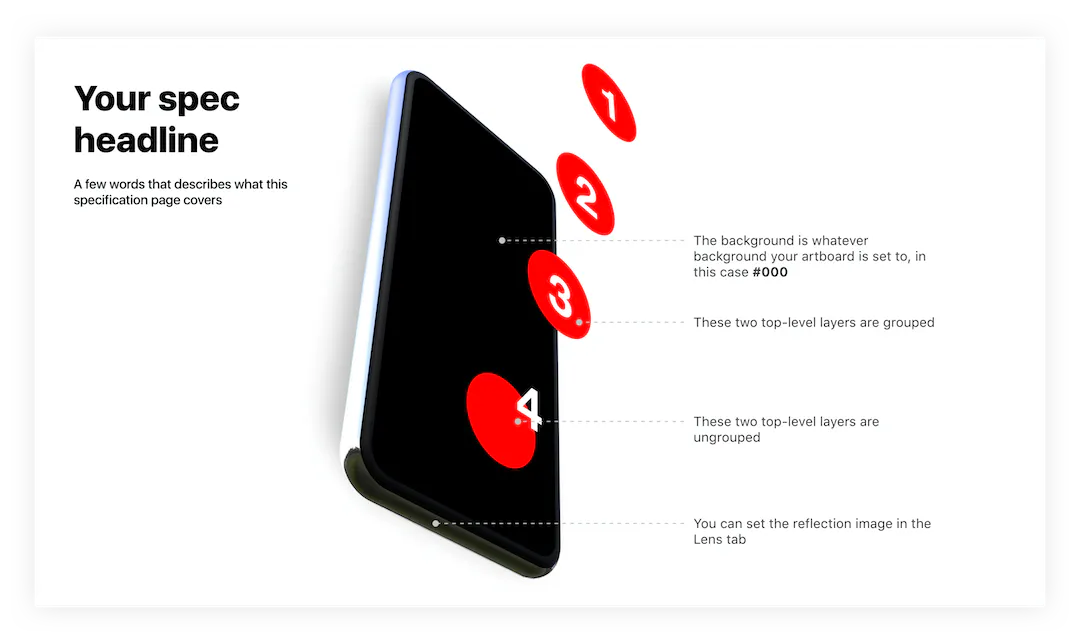
Snapshots
Click the Snapshot button at any point and get a crisp 4K PNG of your exploded masterpiece. This is great for specifications for UIs that have a lot of elements. In presentations, but be prepared to hear people whisper "wooow."
Animate exploded artboards
You can animate your exploded artboard just like any other animation in Rotato. But with exploded layouts you can also animate the levitation of the floating 3D elements.
1. Go to the Animations sidebar
2. Position your 3D device and set your levitation in the Looks sidebar
3. In the Animations sidebar, click Add view
4. Position your 3D device again, and set your levitation
5. In the Animations sidebar, click Add view
You now have two keyframes. Click Play (▸) on one to animate to it. Click Render ( O ) to save that animation as a high-definition video in 60 frames per second.
Optional: Change the center of the rotation
By default, Rotato rotates around the center of the device scene. You can change this by holding down command and clicking on the device or one of the floating 3D layers at the position of your choosing.
Here's a few examples where we've set the rotation center on the red 24 date layer.